Deliveries are at the heart of Death Stranding's gameplay, since everything ultimately depends on the smooth transport of merchandise from point A to point B. In this guide, we will see the main features of the cargo management menu and how to understand it as quickly as possible.
Quick access to the cargo management menu
If you wish to modify or add merchandise, the fastest access to the cargo menu is via the map. Your cursor will be, by default, on Sam: leave it here and simply press X to go directly to the cargo management menu. We tend to forget it as the map is overloaded with information. Near a vehicle, simply follow the directions and stay keep square pressed to access the menu.

Management radius
As we saw in our beginners guide, the cargo menu, no matter where you open it, will scan the items near Sam. If there are any items in this area, they will be displayed at the very bottom of the equipment window in the Not Carried tab. This is a particularly convenient feature if you want to sort many cargoes left on the ground. Similarly, if a vehicle is in the scan range, it will be taken into account so you can load it directly via the cargo menu.

Tabs
This is an important part of the cargo menu: each tab corresponds to an equipment spot on which you can load your goods. Let's review, and in order of appearance, those you will have at the beginning of the game. Note that many tabs will be added as you progress through the game:
- Vehicle (blue): If you have a vehicle near you, this tab will necessarily be above all the others.
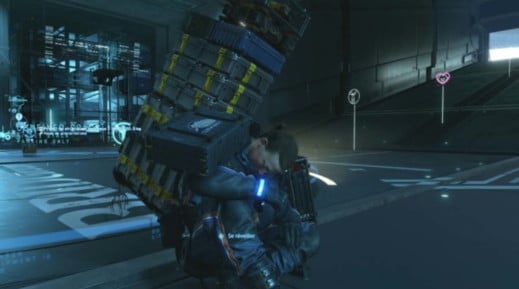
- Carried on back: This is where you can load Sam. Even if you optimize your cargo, you may still have a nice pile of crates on long trips.
- Attached to suit: Your suit has 4 slots, always make sure the whole thing is well balanced to avoid Sam leaning more to one side.
- Tool Rack: As its name suggests, an item to progress on the desolate lands can be stored here.
- Boot Clip: No explanation needed.
- Equipped: Everything Sam carries directly on him, whether it's his boots, the cargo he might have on hand if you decide to carry goods in a suitcase, or a possible exoskeleton.
- Not carried (green): As mentioned above, these are the nearby items you left on land.
When you find yourself in the middle of a delivery having to reorganize your stock, keep this tab system in mind, since the goal will be to navigate one or more lines of items from one category to another.

Visual markers
In the tabs, one line = one merchandise and for each merchandise, you can observe several visual markers. First of all, the most important thing, the highlighting: if your merchandise is highlighted with a blue line, it is because it is a required item for a delivery. If it's green, it's because it belonged to another player.
To the right of the item line, you will see a series of pictographs showing the tabs in which it is possible to transfer it.
Transfer cargo from one tab to another
If you want to move several goods on another tab at once, press the square button next to each line of goods you want to transfer. Once you have checked everything you want to move, press the cross key, it will open the list of tabs where you can move your selection. The grayed out tabs are simply those that will not accommodate what you have chosen (for various reasons like weight, height, etc.).

Used consumables
The objects you have used, such as sealing sprays for example, will be returned directly on Sam if he changes items. You have several options to get rid of these wastes: either you put them in an unused tab or you can keep them on until the next relay in order to recycle them to gain more materials.
Hold down X to confirm
Yes, it's a silly, but we didn't realize it until after about 15 hours of play. Instead of going to the bottom of your merchandise menu to click on validate, simply hold down the X key anywhere in the menu to save all your changes.